Everything you need to know about making & feeding your starter, taking care of it, using it, AND recipes for using your starter discard!
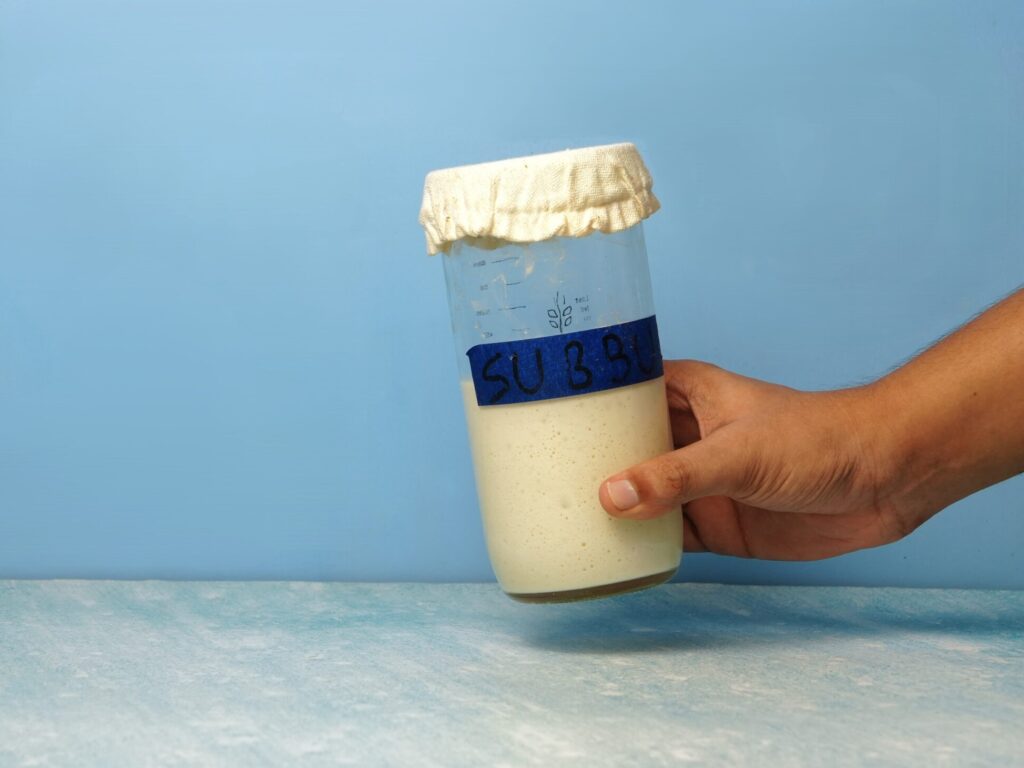
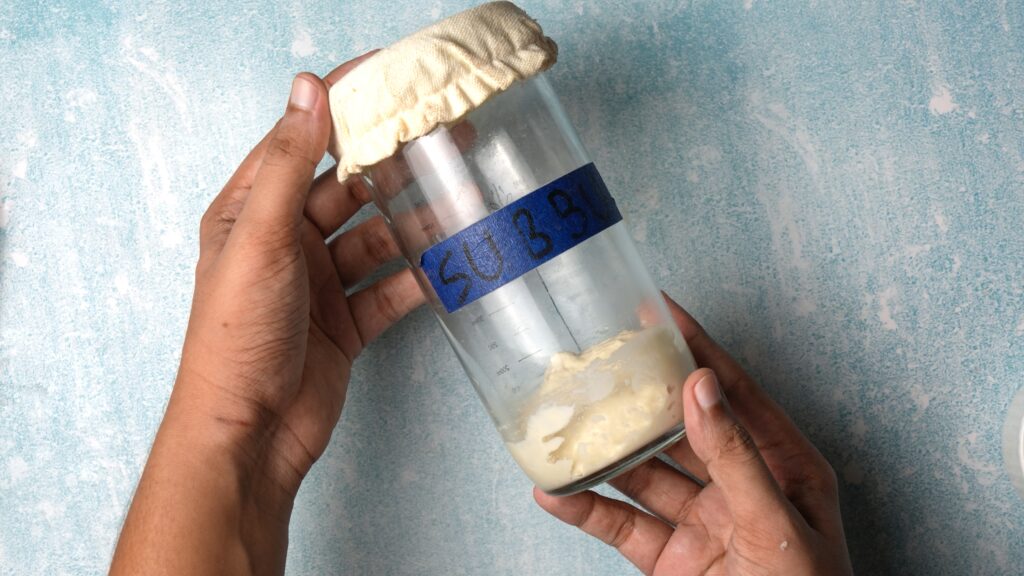
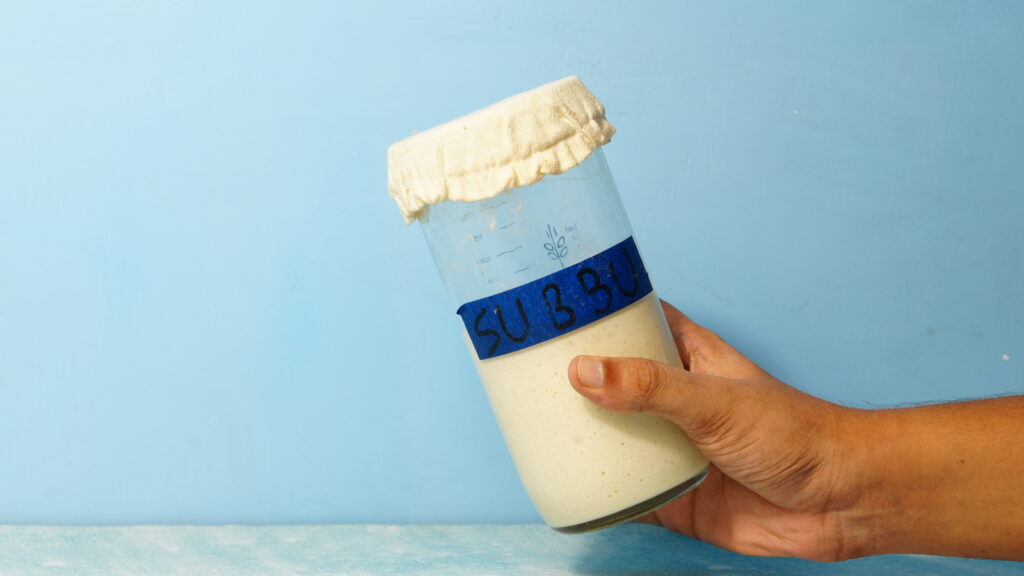
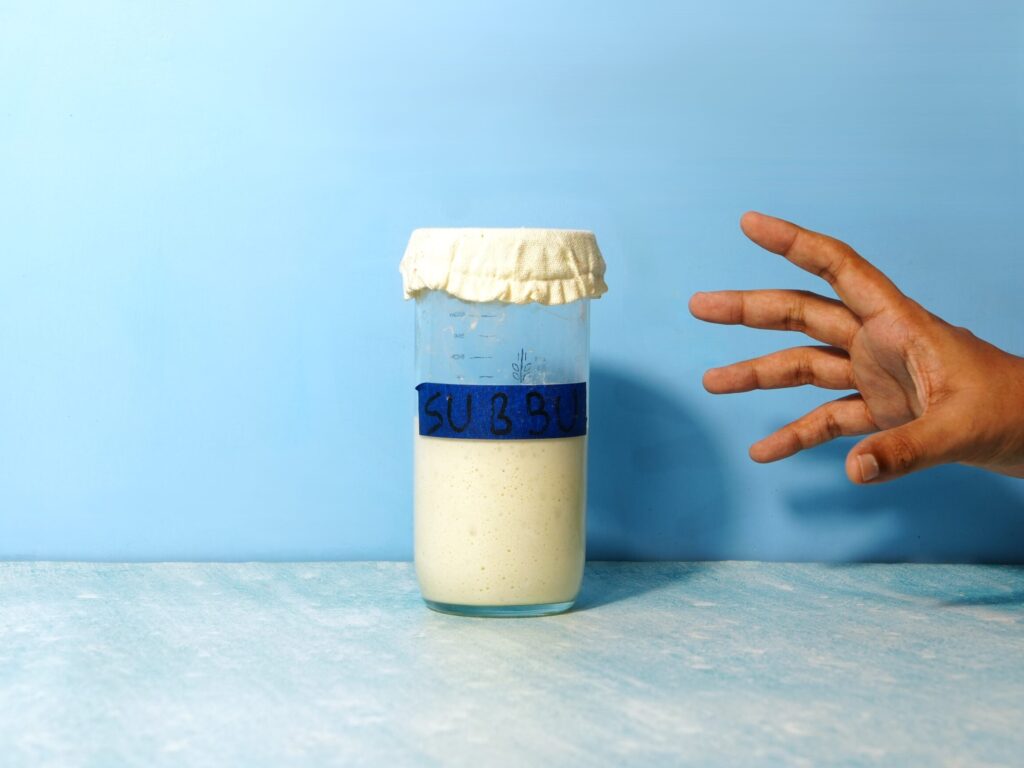
In case you’re unaware, I became a father recently after I hit 10K followers on Instagram. I’ve decided to make a sourdough starter/Levain from scratch to mark the occasion. I’ve decided to feed it and take care of it every single day, and I’ll probably pass it down to my next of kin (If I ever ACTUALLY become a father). And, I’ve named it “Subbu”, short for SUBBALAKSHMI (named after the goddess of good fortune; not the singer). Now, if you’re thinking I’m being a bit extra by investing too much emotionally and making a big deal out of a yeast culture in a glass bottle………HOLD UP! Here’s one of my shoes; let’s both collectively empathise with me.
Starters are PETS. There’s no better comparison. If you have a dog or a cat or a python that’s ready to eat you when you die, you might know that feeding them every day and ensuring that their environment is conducive to their well-being is one of your priorities. Starters are the same. They need food, warmth, and love………in the form of food and warmth. When you take care of your pets, they give you so much love in return, making you feel wanted and cherished. Starters also do the same, but in the form of a physical entity known as ‘Homemade Bread’. Unlike cats, who wait till you’re dead so they can crap on you.
Still not convinced? Lemme hit you with a comparison table between my dog (Scooby) and my starter (Subbu).
Table of Contents
My Starter vs My Dog
My Starter (Subbu):
Eats and drinks very little. (40 gms of flour a day)
Doesn’t pee or crap, just expels CO2. (Exactly what I need)
Does not have a shedding season.
Does not react when her name is called out.
She’s real pretty.
Does not hump my leg.
Honourable Mention: Literally makes the best bread I’ve ever had in my life.
My Dog (Scooby):
Asks me to share food every time I eat something.
Pees on the pillows sometimes, and takes a crap twice a day.
Sheds hair twice a year, like his life depends on it.
It depends on his mood.
Cute AF.
“Dude, you gotta stop, man. I get it….”
Honourable Mention: The rats stay away.
Why you should make a starter. (Even if you don't bake)
Ok, keeping the whole emotional fatherly/motherly feelings aside, making something from scratch, I believe that making a starter from scratch and breathing life into it by taking care of it and feeding it every day reinforces discipline and responsibility. It’s like taking care of a plant. Remember that time when you thought you could take care of one, and bought it just to have it lying dead and dessicated near your balcony 2 weeks later? It’s like that, but this one is a bit stronger and gives you amazing bread loaves that are good for your gut. That’s right. Since sourdough bread is normally made by slow fermenting, unlike store-bought bread, it digests relatively easily, and develops these really complex acids, which are good for your gut.
But keeping aside the whole health movement with sourdough, I just simply think it’s really delicious, and more than the bread itself, I like the whole process of baking it. I like taking a day for myself to prepare this, and let it ferment slowly while I watch something, and carry on with other things. It’s the feeling of building up to something gently, with attention to detail, and immense care that results in something incredible yet so simple. It is the love you show that you get back. It changes your view of how you approach other things.
OH! I didn’t forget those NON-BAKERS. Making a sourdough starter doesn’t always have to end up in bread. You can make a couple of other recipes (which are available below) that don’t require an oven or any other electrical appliances. Or, even better! If you know someone in your life who is into baking and can’t find time to do this, do it for them and pass it on! I think this blog is just turning into my wishlist for my birthday….
How to make & feed your Starter
(Step-by-step guide)
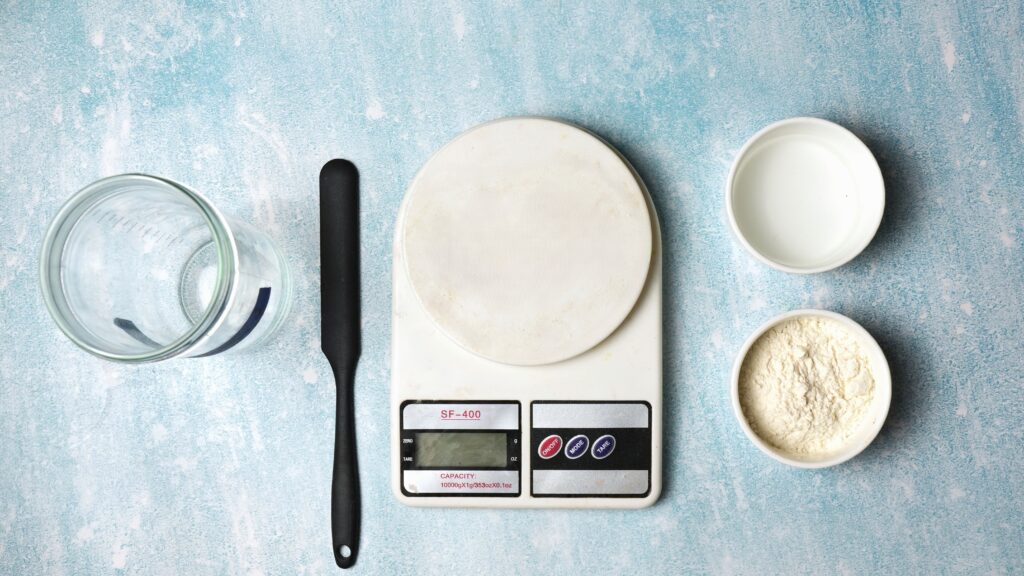
EQUIPMENT: (All you need for creating your own yeast culture)
A Glass Jar (avoid plastic)
A Silicone Spatula, ideally one that is smaller, and can easily scrape inside the jar.
A Porous Cloth to cover on top, with a rubber band.
(Optional) A Box for storing Starter discard (more on this later)
INGREDIENTS:
First feeding: 50 gms of water + 50 gms of flour [25 gms of All-purpose + 25 gms of Whole wheat] (Next day) Second & for continuous feedings: 20 gms of Starter + 40 gms of water + 40 gms of flour
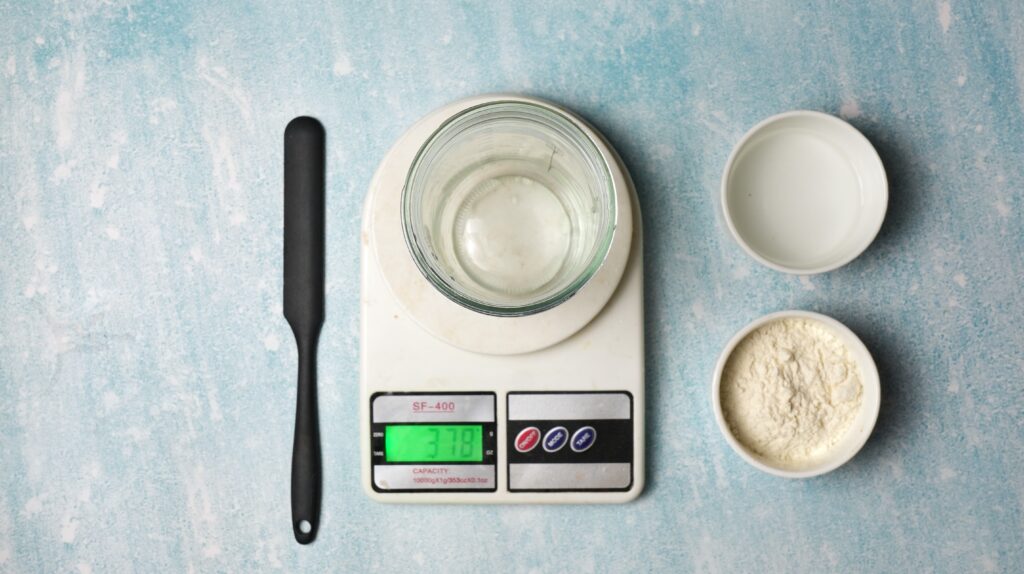
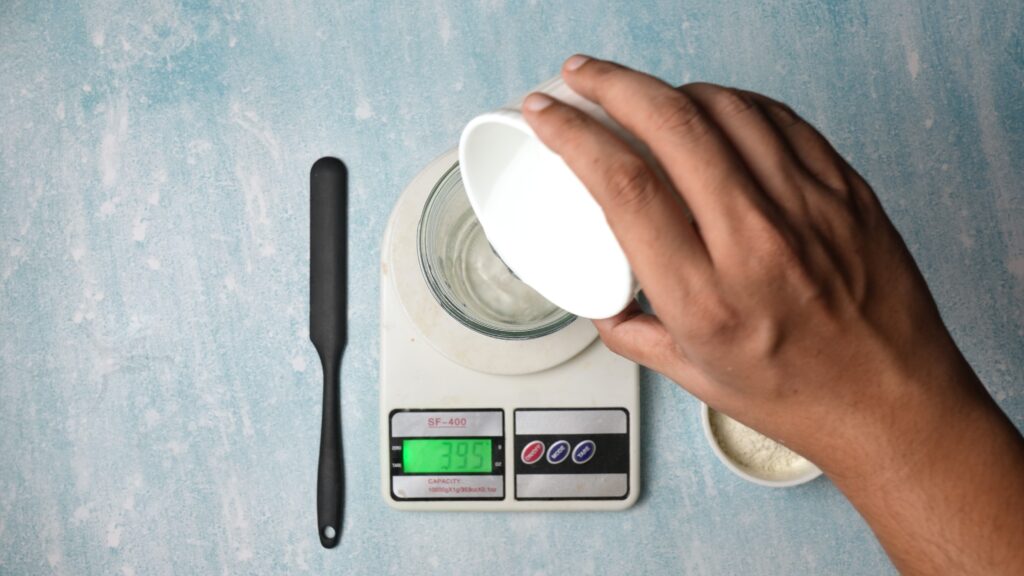
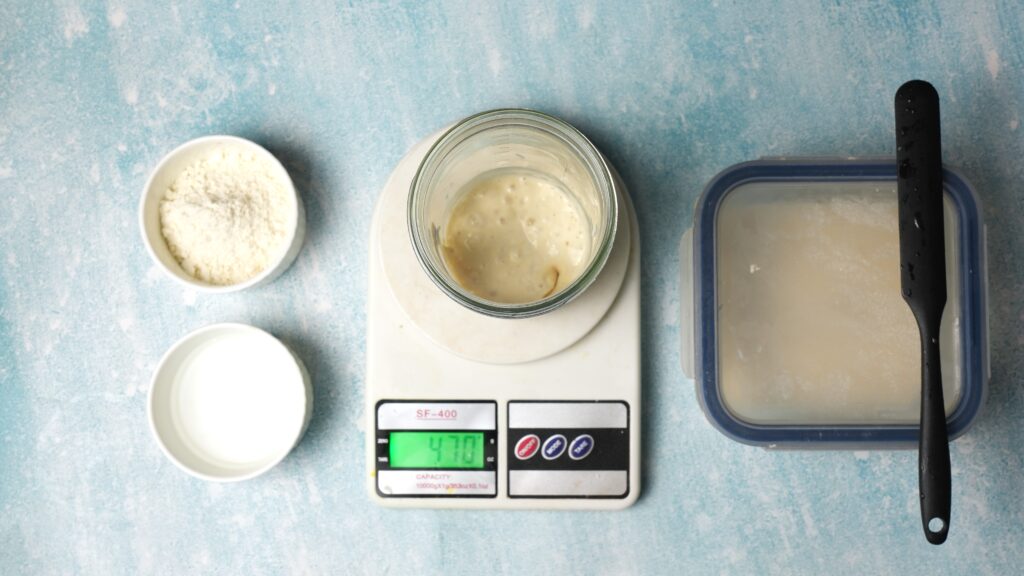
1.) First, measure the empty jar. Note the weight [Wt: 378 g]
2.) Now, add 50 gms of water to the jar.
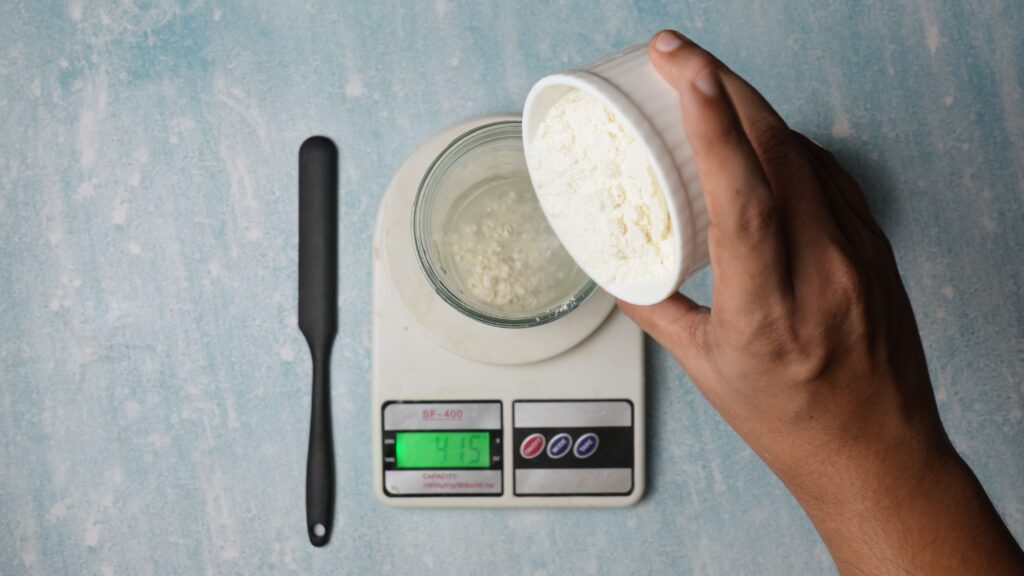
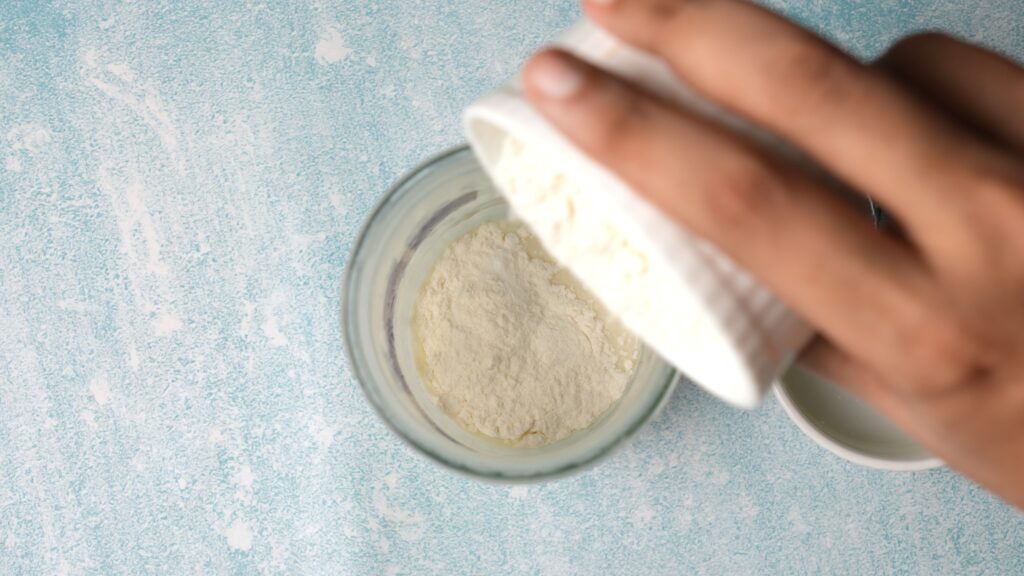
3.) Add the 50 gms of flour to the jar.
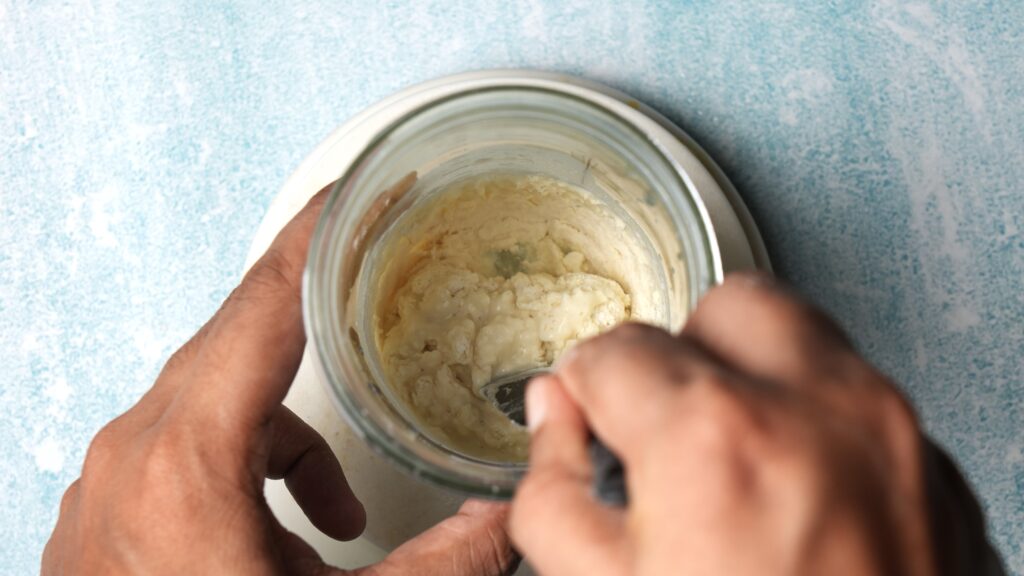
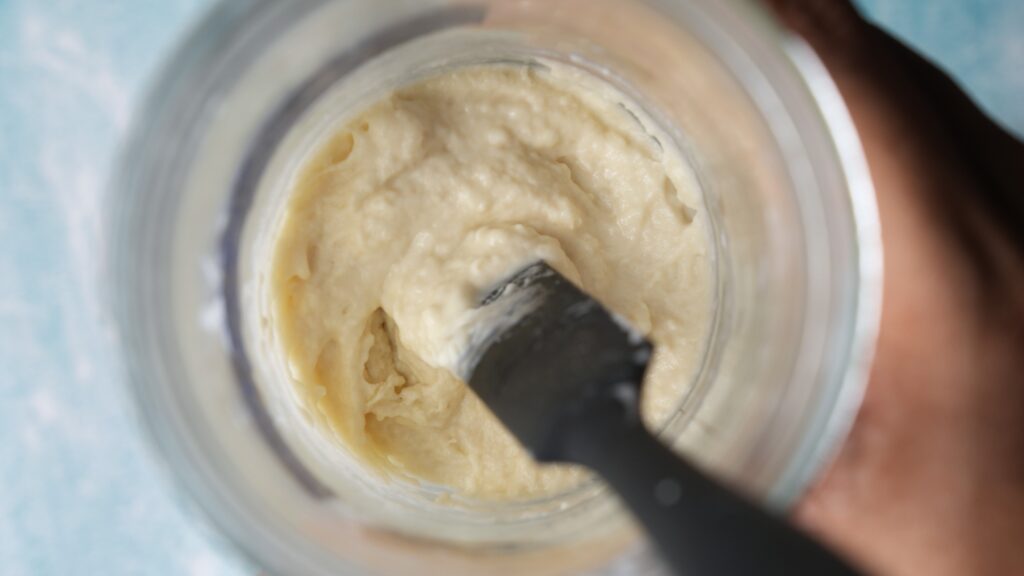
4.) Mix until evenly combined with no dry pockets of flour.
5.) Cover and keep in a warm spot for a day. [Note feeding time]
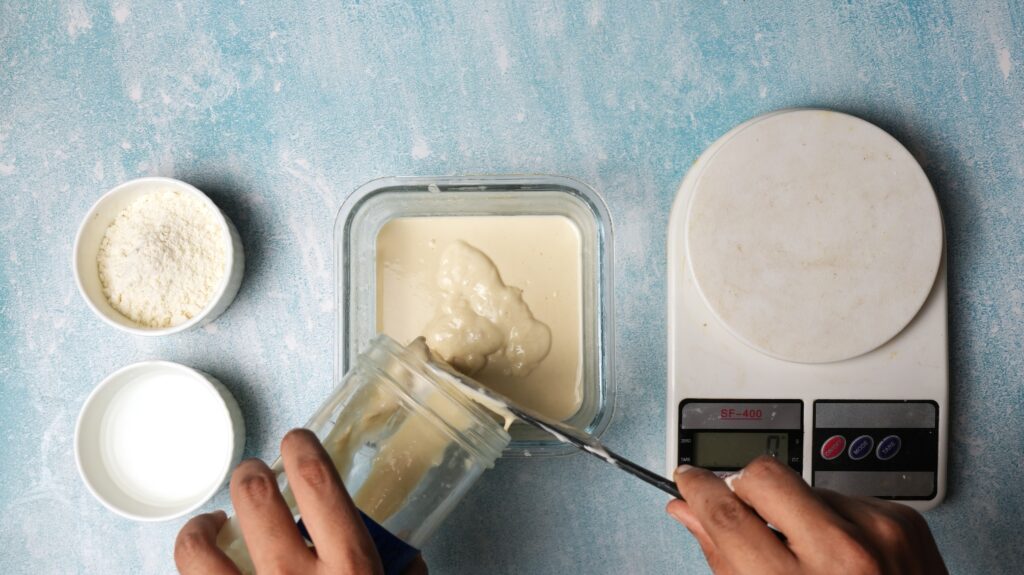
6.) Next Day: Measure the jar again. Discard 80 gms of starter.
7.) Store the starter discard (To be used later, No waste!)
8.) Now, add 40 gms of water to the starter in the jar & mix well.
9.) Add 40 gms of flour. [Feeding ratio = 1:2:2 (Starter: Water: Flour)]
10.) Mix until well combined. Scrape the sides of the jar as well.
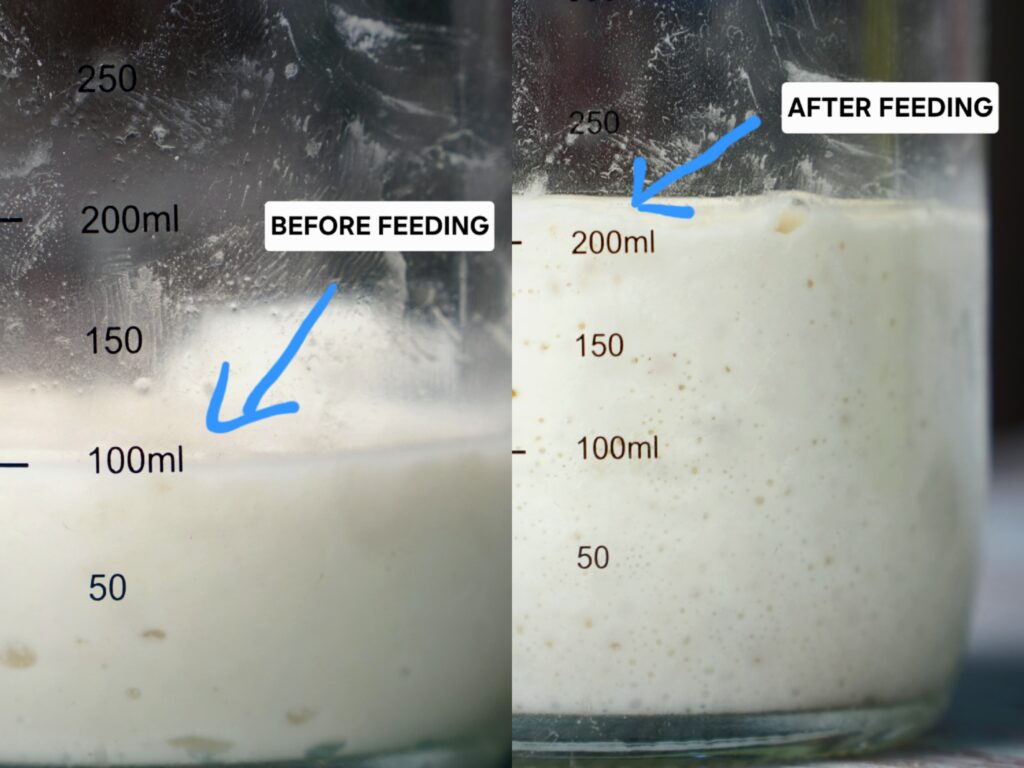
11.) Cover it & check the levels before and after feeding.
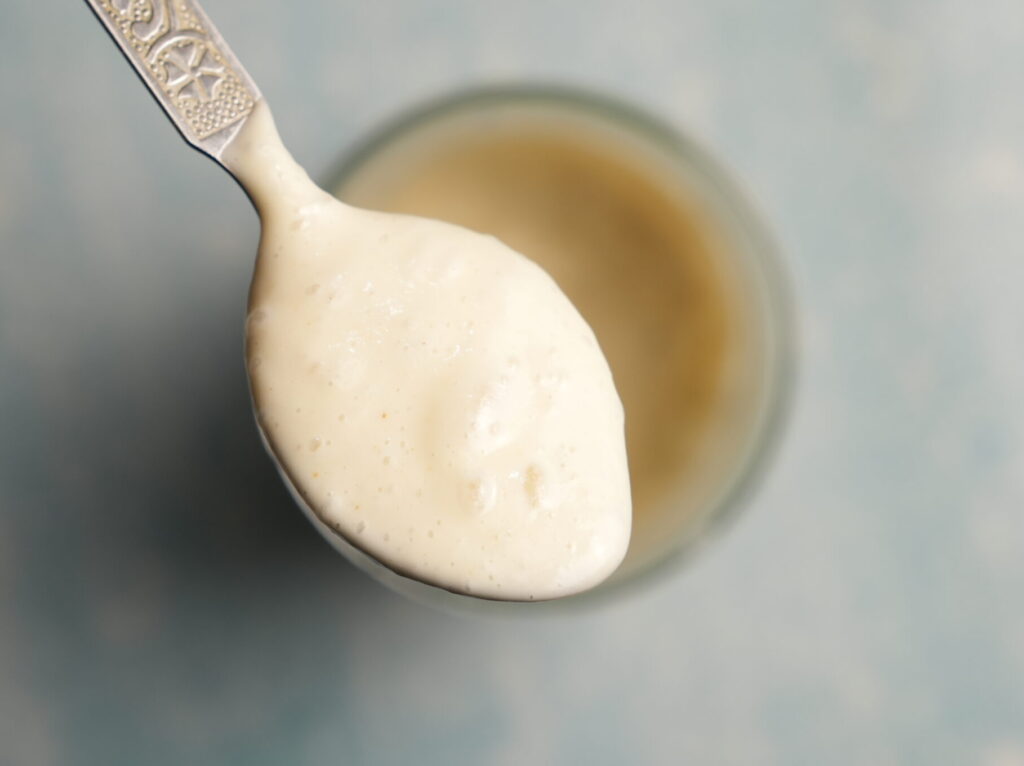
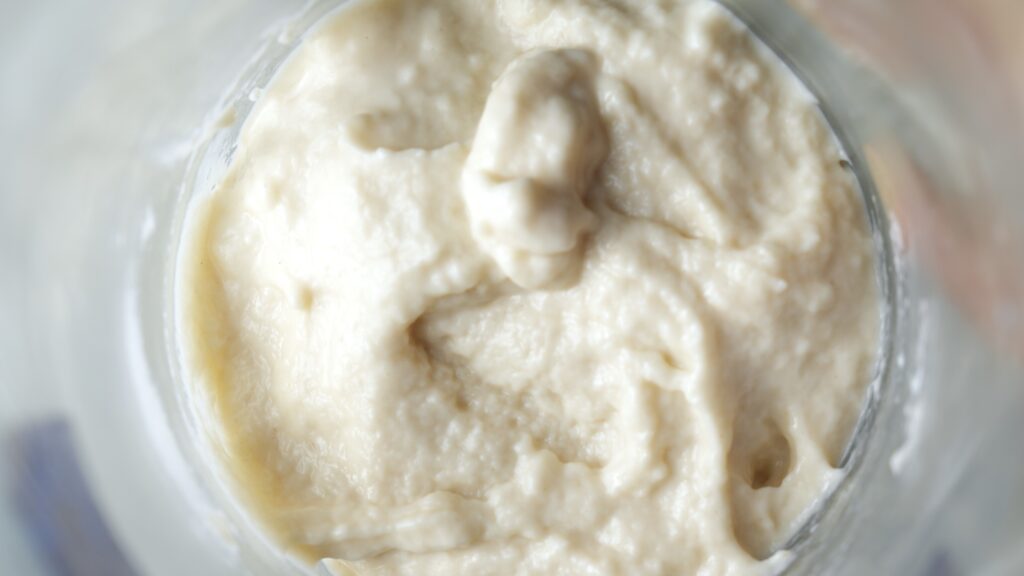
When the starter doubles its size or reaches its peak in 6-8 hours, it's ready to be used. (Subbu has risen in 6 hours)
Not-to-be-skipped-notes (I'm SERIOUS!)
Every Starter is different. One might take one week, the other might take 3-4 weeks to mature. As stated above, if the starter expands and reaches it’s peak point in (6-8 hours), it’s strong enough.
Feed the starter once a day in the 1st week. You can optionally double the feedings (with a 12-hour gap) if you want to strengthen it quickly for usage.
If you’re not using your starter immediately, you can store it inside the fridge after the first week of feeding, and feed it once a week. It might take longer to mature. When it does, feed it a couple of times before using it in your product.
If you’re storing your starter discard, it’ll stay good in the fridge up to 3-4 weeks.
When to use the starter: You have to use your starter at its most active point, which is right where it peaks (expands to its highest point) and collapses a little. That’s when to use it. Calculate your baking times accordingly.
(If you want to, you can buy the same starter jar that I use. I would highly recommend it. Here’s the link!)
Recipes w/h Starter Discard
No one wants to waste food or opportunities. Since you’ll be feeding your starter regularly, that comes with a fair amount of discarding the old starter to replenish it again and again. It’s part of the process & it’s inevitable. However, you can use your discard in literally any baking recipe by adding a little bit. But, I’m gonna give you two recipes that you can make to use your starter discard, and you don’t even need an OVEN!
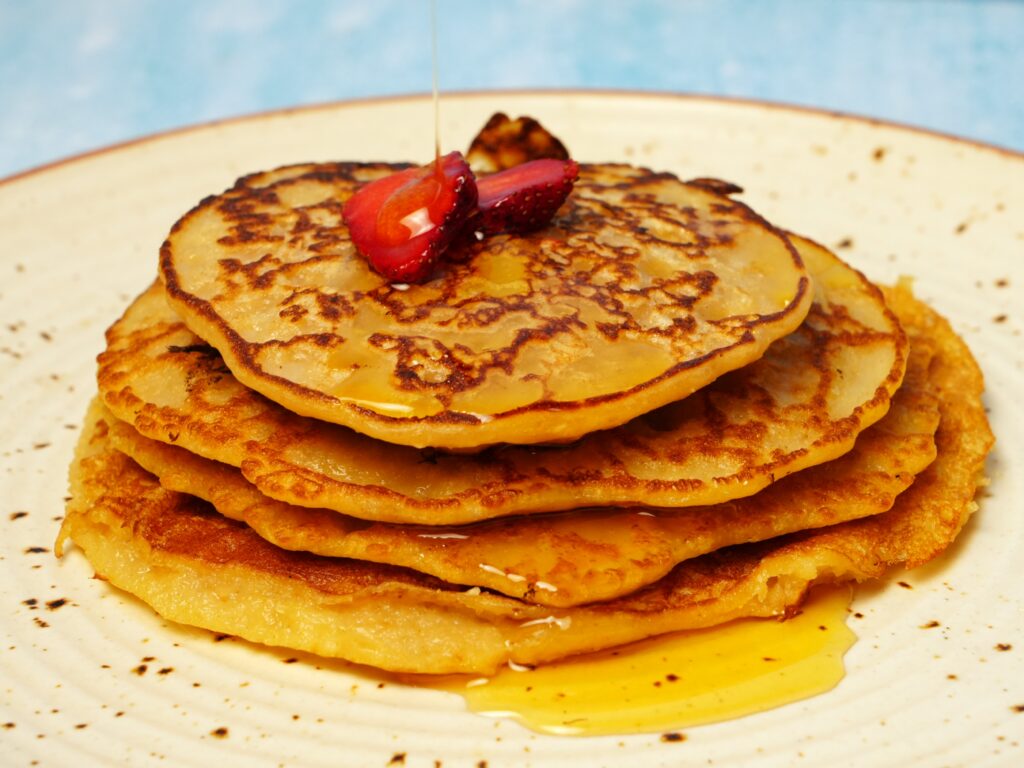
Starter Pancakes
Ingredients
50 gms of Starter Discard
1/2 cup of Milk
2 tsp of Honey
A pinch of Salt
1/4 cup of Whole Wheat flour
1/4 cup of Oats
Oil for greasing
(Optional) 1 no Egg
(Optional) A serving of Protein powder
Procedure
In a bowl, add your starter discard, milk, honey, and salt. Mix till combined.
Add your whole wheat flour and oats. This is also the opportunity to add an egg and some protein powder if you’re hitting your daily goals.
Mix till combined with a spatula. Make sure there are no pockets of dry flour in the batter.
Heat a frying pan or tawa, and grease it with oil or skip the oil if using a non-stick pan. Add your batter once the pan is hot.
Let it cook on one side completely, and flip it and cook the other side.
Serve it with either syrup, honey, Greek Yogurt or peanut butter spread to keep it healthy.
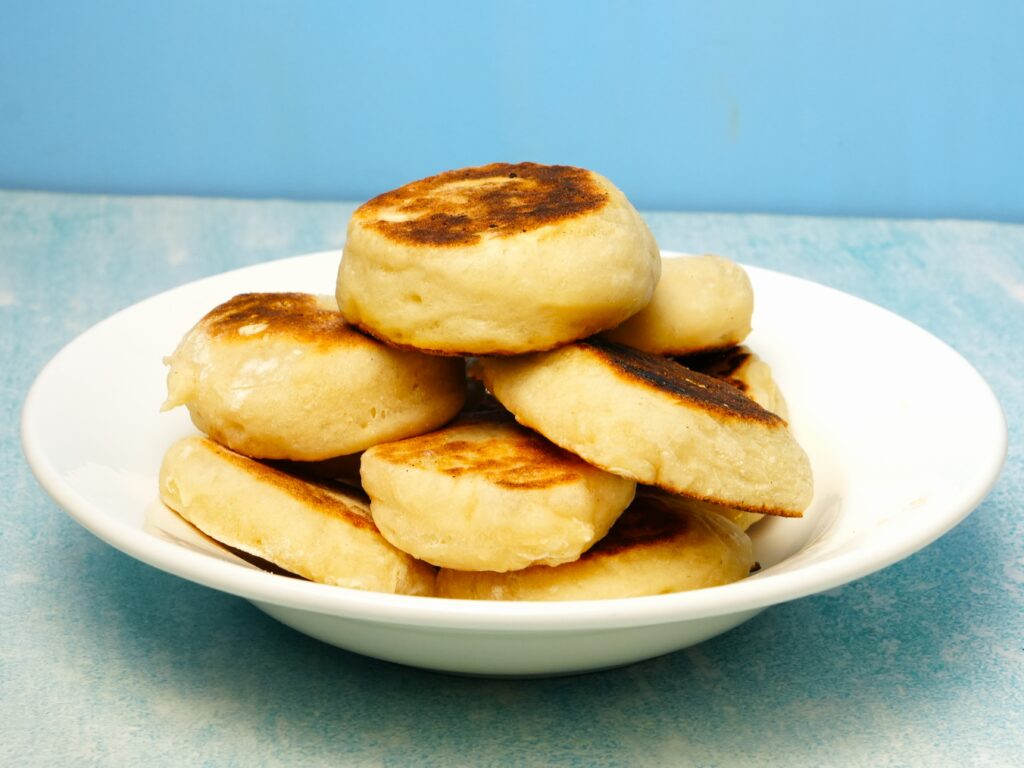
English Muffins (Crumpets)
Ingredients
250 gms of All-purpose flour
50 gms of Starter discard
12 gms of Sugar
5 gms of Instant dry yeast
5 gms of Salt
150 gms of water
15 gms of Oil
Procedure
In a bowl, mix water (room temp), starter discard, sugar, and instant yeast.
Sieve together flour and salt into the wet mixture. Combine with a hand or a spatula. Once everything is hydrated, take the dough onto a working surface.
Knead it for at least 10 mins until the dough is smooth and elastic. Add the oil, and incorporate it into the dough.
Round the dough into a ball shape, and let it ferment inside a greased bowl for one hour.
After it has doubled in size, knock back the dough and roll it into a 1-1/2 inch thick sheet. Using a cookie cutter or a glass with a thin edge, cut it into 8 equal circles.
Onto a plate or a tray, dust some flour and carefully place these discs. Cover and let them ferment for 45 mins.
Heat up a frying pan or tawa. Carefully remove the dough discs using a turner or an offset spatula.
Place them in the pan, and let them cook on medium heat. Flip after a couple of mins, and cook the other side.
Let them cool slightly, and cut them in half horizontally. Apply butter, peanut butter, jam or any other spread and serve.
These are best eaten during breakfast and can also be used to make breakfast sandwiches.
Conclusion
There’ll come a day when you’ll die, but your starter will live on. It will carry your memories of baking, and take it with it to your next of kin. Some families in Europe have 150-year-old starters passed down as generational wealth. Well, if you’re either planning to not leave your future kids anything in your will or you want to give them something that is more than just a living entity that shows them the power of patience and perseverance, you should make a starter………and name it because free will is a thing.